


OBJECTIVE :
- The objective is to learn (or perfect your skill) to apply window film to Architectural Glass using Tint Depot endorsed methods of installation. You will learn to use the right tools for the job and how to maximize your installation efficiency.
PREVIEW — STEPS FOR INSTALLING FILM ON ARCHITECTURAL GLASS
- Measuring and calculating film use
- Laying out film and window size
- Linear vs. square foot
- Width vs. cost
- Minimizing material waste
- Pricing the job
- Select the right tools for the job
- Site and window preparation tools
- Film cutting tools
- Trim guides and measures
- Spray bottles
- Application solution
- Before leaving the shop
- Prepare the customer
- Inspecting the film
- To pre-cut or not
- Preparation of area and window glass
- Dry scraping
- Wet cleaning
- Wet preparation
- Cutting the film
- Methods
- Unique Windows
- Handling and hanging the film
- Handling
- One-man reverse roll
- Hanging
- Trimming
- Squeegee
UNLOCK THE SECRET TO SUPERIOR INSTALLATION
- The right tools
- Very clean windows
- Good cuts
- Diligent use of the squeegee
INSTALLATION
- Learning the craft of installing window film is critical to the success of your business. Your future is built on your past. By hanging the Tint Depot professional quality window films perfectly, your customer will receive a product that will bring him or her satisfaction and you referrals.
MEASURING AND CALCULATING FILM QUANTITY FOR A PROJECT
- Measuring, calculating film requirements and reducing material waste when undertaking an installation maximizes profit on a project. To a newcomer it can seem very confusing that an installation is generally priced to the customer per installed square foot of window film while the film is purchased from the manufacturer by the linear foot on a roll.
Film Width
- Architectural window film is available in standard rolls that are 36″, 48″, or 60″ wide. In addition, some dry adhesive films and some clear safety films are available in 72″ widths. The standard pricing is for 100 linear feet of film. Therefore, a roll of film that is 36″ wide is priced at 3 feet wide by 100 feet long or 300 square feet.
Width Length Square Feet in 100′ Roll
36 inches 100 feet 300 square feet
48 inches 100 feet 400 square feet
60 inches 100 feet 500 square feet
72 inches 100 feet 600 square feet
- When purchased by the roll, film is generally less expensive per square foot the wider it is. This means if you are doing a very large job it may be more economical to buy wider film and cut it. For example, if you are doing windows that are 29 inches wide, the natural tendency is to order 36-inch film and cut the film to 29 inches. This means there is a strip of wasted film 7 inches wide all the way down the length of the film. For an entire 100-foot roll that means there is a total of 58 square feet being wasted. If the 29″ wide windows were cut from 60″film, there would be only 2″ of wasted film down the length of 100 feet of film. The waste would be down to about 17 square feet of film.
- Now lets look at the fact that wider rolls cost less per square foot than narrower rolls. A roll of 36″ wide film costs $.08 more per square foot than 60″ wide film. That means that not only you have saved 41 square feet of film, but that each of those square feet would have cost you $.08 more.
Film is Non-directional
- When planning how to lay out film for a job it is important to consider that it does not matter which way the film for the window is cut from the roll except if you are splicing (see splicing). If you have a window that is 84″ wide and 59″ high, you don’t need to despair that film does not come wider than 84″. Just use 60″ wide film and run it out for 84″ to get the length of the window.
- Three 20″ by 40″ windows may be cut from a 60″ roll in either of two ways:
60″ roll
20″ window 20″ window 20″ window
How To Measure Windows
- Use a 1″ X 25′ retractable tape measure. This stiff tape measure allows you to measure above your head as well as beyond the reach of your arms. This will be sufficient to measure most of the jobs you will encounter including high windows.
- In measuring windows, consistency leads to accuracy. It is up to you to decide if you want to measure and document the width or height first. Many film professionals choose the width first because they are always thinking roll widths. You will find that the consistency will be important not only for a particular job but will become the normal way you do measurements for all your jobs. When measuring glass area, measurements within an inch or so will be fine, just don’t cheat yourself in width. A window you measure at 35 1/2″ better not be over or the 36″ roll you have purchased will not work.
- Record all your measures on a work order. This allows you to create a worksheet for you to do calculations as well as the basis for your proposal/estimate for the customer.
While at the site measuring determine and record:
- Window type, (single pane, tempered, double, etc.)
- Defects or damage (scratches, cracks, or any type of defects) in the window.
- Furniture, window treatments and household items that need to be moved.
- The need for ladders,
- Special tools or situations that require special attention.
- Be certain to go over and leave this Information with the customer.
Calculating Square Feet
- The following hypothetical situation provides an example for calculating the square feet of a job (the way it is priced to the customer) and the linear feet of film required for the job (the way film is sold to you) as well as laying out the windows to be cut.
The Example Windows
Window Type No. of Windows Panes per Window Total Panes Width Height
Sliding Glass Door 3 2 6 44 76
Casement 4 4 4 27 55
Awning 3 4 12 33 13
French 2 15 30 6 12
Sliding Glass Doors
- 1 Set of Doors ( 44″ 76″ )
- Casement Window ( 27″ 55″ )
- Awning Windows ( 33″ 13″ )
- French Panes ( 6″ 12″ )
Calculating Square Footage
- Using the sliding glass doors for our example, there are 3 door sets with 2 panes each, 44″ x 76″. To determine the square feet of one pane of the door, multiply 48″ x 76″ which equals 3,648 square inches. To convert to square feet divide the square inches by 144, as one square foot is equal to 144 square inches {12″ x 12″=144 square inches). Once we have the square feet of material required for one window of the door we simply multiply it times the number of doors which in this case is six.
- The formula is:
- Total Square Feet = (width x height) /144 x number of panes
- The calculation is:
- Sliding Glass Doors –
44″ x 76″ = 3,344 sq. inches
3,648″ /144 sq. inches = 23.2 sq. ft.
25.3 x 6 panes = 139.3 square feet
- The rest of the windows are calculated the same way:
Casement Windows –
27″ x 55″ = 1485 sq. inches
1485 ” /144 sq. inches = 10.3 sq. ft.
10.3 sq. ft. X 4 panes = 41.2 sq. ft.
Awning Windows –
33″ x 13″ = 429 sq. inches
429″ /144 sq. inches = 2.97 sq. ft. (use 3 sq. feet)
3 sq. ft. x 12 panes = 36 sq. ft.
French Panes –
6″ x 12″ = 72 sq. inches
72 /144 sq. inches = .5 sq. ft.
.5 sq. ft. x 30 panes = 15 sq. ft.
- Job total
Window Type Total Square Feet
Sliding Glass Door 140
Casements 41
Awning 36
French 15
Total 232
FILM LAYOUT AND DETERMINING LINEAR FEET
- When calculating linear feet, using roll widths closest to the width of the window can save on film handling and usually cutting. But giving consideration to other options for film layout may well save material and job costs.
- From the example widows, since the length of the sliding glass doors, 76″, is wider than any roll width, the best option is a 48″ width roll for the 44″ wide panes and run them lengthwise. In calculating the linear feet, we add together the length of all the windows that are cut from this size roll of film. The doors will take 38 linear feet of film. To calculate the square feet of film used for the doors, we multiply the linear feet times the width of the roll, which equals 152 square feet of film.
- Let’s examine three options for laying out the casement windows. If we lay them out side by Linear side on a 60″ roll, there will be 6 inches of waste or 3″ on each side of the roil. Since the
windows are cut side-by side, to calculate the linear feet we take the length of the windows times 2 for the linear feet of film. This is 110 inches or 9.2 linear feet. The square foot of film used Is then 9.2 linear feet times the width of the roll or 5′, which equals 46 square feet of film. - If we lay the casement windows across the 60″ roll we end up with 5″ of waste down the roll. This time we use the width of the window to calculate linear feet. Since we are going across the roll we multiply the width of the window, 27″ times 4 windows for a total of 108″ or 9 linear feet. This reduces the square footage to 44 square feet of film. While this does not sound like much savings for 4 windows, it becomes really significant in an office building with 2000 windows.
- To minimize handling of film, or to reduce the number of roll sizes needed for this particular job. the casements could be cut lengthwise from a 36″ roll of film. This would take 220 linear inches for the four 55″ casements, or 18 linear feet of film. The square feet would be 55 square feet of film. While this is 20% more film, and the 36″ roll size costs more per square foot, if It is faster for the installer to hang the film in the long run this could be the best option.
- For the 33″ awning windows, cut the width of the window out of a 36″ roll of film. This is a very simple set of windows to cut.
- Because French panes are small they may be cut from the film side by side. In this case, each window is 6″ x 12″, these work best cut from a 36″ roll with 3 cut side by side or across. Since there are 30 of these panes there would be 10 rows of three across on a 36″ roll.
When Purchasing Film
- In addition to 100-foot standard rolls, film may be purchased in rolls of 75, 50 or 25 feet. There is a charge for cutting the roll.
- This job is done out most efficiently on at least two different roll sizes: 48″ for the sliding doors and at least a roll of 36″ for the rest of the job. If we were to purchase just the two rolls we need to purchase a 50 foot roll of 48″ wide film for the 38 linear feet of material needed for the sliding glass doors. The remainder of the job could be done with 36-inch material. This would require. 18 linear feet for the casements, 13 linear feet for the awnings and 5 linear feet for the French Panes. The total linear feet are 37 feet. Again this means we have to purchase a minimum of a 50-foot roll.
CUTTING EDGE TOOLS FOR PROFESSIONAL RESULTS
- Why use the right tools? Tools save time, money and improves installation quality. Having the right tool at the right time makes professional results a snap.
- Tool List
1. Drop cloth
2. Cleaning Squeegees
3. installation Squeegees
4. Card Squeegees
5. Razor Scrapers (small to large)
6. Knife with snap off blades
7. Paper Towels
8. 5 Way Tool
9. Edge Tool (Chiseler, Gold Card, etc)
10. Tape Measure
11. Ladders, screwdrivers, etc.
12. Spray Bottles
13. Baby Shampoo
- Tool: Drop cloths
- Why: To protect the customers’ furnishings and floor from the water and solutions used in installation.
- Tips for use: Using a drop cloth lets the customer know you care about their furnishings. Use caution when using ladders on drop cloths. The drop cloth can tangle around the base of the ladder when it is being moved. Keep your drop cloths clean. You will need to wash them frequently.
- Tool: Cleaning Squeegees
- Why: To clean windows and dry windows
- Type: Pro SS Squeegee 6-12″, handles and blades
- Tips for use: When cleaning windows, pull the squeegee from one side of the window to the other. This moves the dirt away from the middle and to the edges.
- Tool: Installation Squeegees
- Why: To press film onto window and eliminate water from behind the film.
- Type: Blue & Clear Max, 6-8″ Aluminum Squeegee. Wood & Gold Metal Squeegee
- Tips for use: When eliminating water push the squeegee toward the window edge. These squeegees can take the pressure needed to adhere the film to the glass. As long as it is clean, the squeegee will not tear the film.
- Tool: Card Squeegees
- Why: To push out water from the edges as well as to secure the edges of the film
- Type: 4″ Blue and Gold, PVC, Nylon, Teflon & Little Chiseler
- Tips for use: Used in finishing off the window edge by wrapping with a paper towel and pushing toward the edge to soak up water. The Little Chiseler works well to lay down the edges of the film.
- Tool: Scrapers and blades
- Why: To clean the glass and to remove old film
- Type: Retractable Blade Scraper, Plastic Scraper, 4″ Heavy Duty Scraper, 6″ Triumph Scraper,
- Tips for use: 4″ Heavy Duty Scraper is used to clean caulk & silicone from around the edges of the windows. Other scrapers are used to clean the glass itself. Be very careful when using any of these tools. Always place covers on blades. If covers are not available, put away immediately when you are done. Blades must be sharp with no rust.
- Tool: Scrubbie Pad
- Why: To remove stubborn dirt in window cleaning
- Type: Scrubbies
- Tips for use: Use with window cleaning solution to remove grime from window. Use with scrapers on very dirty windows or on windows where the scrapers may damage the glass.
- Tool: Knife with snap off blades
- Why: To cut film
- Type: Olfa 8 point regular and heavy duty, NT, Economy
- Tips for use: Only use stainless steel blades when possible. Use regular knives for up to 8-mil film, heavy-duty knives for 10ml and thicker. Dispose of used tips properly.
- Tool: Spray bottle
- Why: To spray a fine mist of cleaning solution, mounting solution, or clear water. Use a separate bottle for each liquid.
- Type: 32 Ounce Spray Bottle with Trigger
- Tips for use: Used mostly for automobile installation or small windows.
- Tool: Large sprayer
- Why: A higher volume sprayer.
- Type: 2.5 Hand Held Pressure sprayer
- Tips for use: Do not over pump the sprayer. Adjust nozzle to spray a medium mist and spray the window and the film from side to side being sure to cover all areas without allowing the water to flow down.
- Tool: Pressure sprayer
- Why: To wet film and windows, especially useful for large jobs.
- Type: 3 Gallon Pressure Sprayer with Hose
- Tips for use: Do not over pump the sprayer. Adjust nozzle to spray a medium mist and spray the window and the film from side to side being sure to cover all areas without allowing the water to flow down.
- Tool: 5-way Tool – Trim guide
- Why: To use as a guide for cutting smooth trimmed edges and when wrapped with a paper towel to dry the edges at the frame.
- Type: 5 Way Tool, 8″ & 12″ Aluminum trim guide.
- Tips for use: Wrap paper towel around tool and go around the edges of the window where the frame meets the glass.
- Tool: Ladder
- Why: To reach high windows
- Type: Little Giant Ladder
- Tips for use: Little Giant Ladder is a must. It can be used in many applications where multiple ladders would be needed. Do not use booties when on a ladder. Instead consider a pair of sneakers used only for the interior of jobs and keep them clean.
BEFORE LEAVING THE SHOP
Prepare the customer
- Prepare the customer, so he or she can prepare for the job. The Installation
Preparation Checklist is for you to leave with the customer when the job is sold.
This way the customer will know what to do, and may actually do it! If those items are not done, the use of the checklist provides you the opportunity to explain there is a charge for such services. - Check to be certain the selected film is appropriate for the glass and window type. Check double pane and tinted glass especially closely. Use a film to glass application chart to confirm film choice.
- If possible have the customer:
- Remove all items such as plants, pictures and miscellaneous knickknacks from the windowsills and surrounding area.
- Position window treatments to allow for easy access to the windows or even remove them.
- Remove and/or re-arrange any furniture so the installer’s can access the windows.
- Remove all pets.
Double-check, saves coming back
- Before leaving the shop, take a moment to call the customer to make certain someone will provide access to the site and get directions if necessary. Double check the film you have packed:
1. Film type
2. Film size
3. Film quality
4. Tools (Drill, screwdrivers, hammer, ladders, etc.)
To Pre-cut or not
- You may want to consider pre-cutting in the shop rather than on the job site.
Advantages Disadvantages
Save film Takes more time
Improve inventory control Could cut sizes wrong
Impress customer Could run short of film
PREPARATION PAYS
Pre-lnstallation
- Take a few minutes to inspect all windows with the customer before the installation begins. Now is the time to determine if flaws exist in the glass. Make certain there is no dispute later about whom might have caused those flaws. Note broken glass, loose panes and/or any imperfections in the glass. Be certain the customer knows what will happen with stickers, alarm systems and/or any other items that affect the installation. In addition, note with the customer, if the building or home has a history of glass breakage and/or IG unit seal failure.
2. Check type of glass to be sure the right type of film is being used.
3. If the customer has not done the actions in the Installation Checklist, the installer will have to do them before beginning the job. Make certain:
– Items on the windowsill are removed and furniture does not block access to the windows.
– Stop airflow. Air conditioning and heating vents are closed or are not blowing in the direction of the work area (especially in the case of dust or pets in the area). Ceiling fans are turned off.
4. Set up your work area.
– Make a workspace. Allow yourself free access to the windows.
– Always start with the largest windows first. If an error is made then the good portion of the film can be used on smaller windows.
– Target a large window as your work surface window for more efficient film handling.
– Select an out of the way area for waste. Place the liner from the first window here and put the rest of the waste on top of it. When job is complete the waste can be rolled up into a small ball and taped closed using a scrap piece of film.
5. Drape the area. Lay down drop cloths to protect the customer’s carpet. This will let the customer know you care. To further protect the customer’s carpet, wear booties or use clean new sneakers specifically used for jobs (booties can sometimes be slippery). These are the little things that count with your customer.
6. Get your tools set up. The best application solution is water and baby shampoo. Rule of thumb is to use about a teaspoon of shampoo to a gallon of water. This will change depending on atmospheric conditions. Generally the cooler the climate the less shampoo.
7. Make sure you have new and clean blades in your scrapers and only Stainless Steel snap off blades for your knife.
INSTALLATION PROCEDURES
Preparing The Window And Frame
- When asked if you do windows, your answer will now be YES! A clean window is most important for a professional film installation.
Clean the frame
- Clean the frame to prevent dust or dirt moving from the frame onto the glass surface when you are hanging film. Dirt migrating from the frame is a film installer’s nightmare. Each piece of dust trapped under the film shows when caught by the light.
HOW: To clean the frame
- Remove all caulking, silicone, or dirt from the edges of the glass. First, use a knife and break the bond between the caulk/silicone and the window frame. Then, use a razor scraper and scrape the caulk off the glass. If the windows are old and the caulk is brittle, do this dry and wipe the caulk away using a brush or a hand held vacuum. For new windows with soft caulk, do this wet. Wipe all parts of the frame, including the sashes, stops, jambs and casing with a damp cloth and a light solution of mild detergent.
Scrape the window
- If there are any foreign particles that are adhered to the glass, they must be removed before installing film. Scraping a very wet window with a razor tool, is an excellent way to do this. Remember the larger your tool, the harder it is to handle, but the more your cleaning time will be reduced.
HOW: To scrape the window
- While the window is wet, re-spray the surface. Use the scraping razor tool of your choice to scrape the window. Keep the tool at a 45° angle and work in smooth, overlapping strokes. It is very important that you keep the window wet to prevent scratching the glass.
Cleaning the window
- After scraping the glass and cleaning the frame and sill, wash the glass surface. With a solution of a few drops of soap concentrate to a quart of water. Scrub the surface with a scrubbie if necessary.
HOW: To clean the window
- Clean the window by spraying with a solution of a few drops of soap In a quart of water. To remove any debris left by the razor tool use a scrubbie to go over the surface of the window.
Squeegeeing the window
- Once the window Is scrapped It Is most Important to squeegee the window down to remove any remaining soil and dry the glass.
HOW: To squeegee the window glass
- Re-spray the window with the soap and water solution. Coat the glass but do not let it run down In streams. Use a large window squeegee and starting from the top, squeegee completely across the window from one side to the other. Do not stop In the middle. Use a paper towel to wipe the squeegee clean and repeat the process, working down the window. Once all the water is removed wipe the edges around the window with a paper towel to remove any remaining dirt.
Cut the film from the roll if you did not precut the film.
- This is referred to as the rough-cut. Before cutting film, re-measure the window. Do not rely on previous measurements.
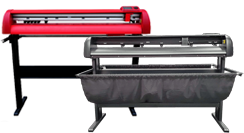
- After the rough-cut material will be easier to handle. There are several ways to do this including pulling from the box with a 8-point blade set In the box as the cutting blade, using a cutting table or a “Film Handler”. The “Film Handler” is an ideal piece of equipment used to hold the roll while razor blades are place on a guide. This performs the cutting and measuring as the film Is dispensed from the roll.
HOW: To rough cut the film
- Measure the width and the height of the glass. In the film box, use a tape measure from the edge of the film roll across the roll to the proper width of the window. Add !4 inch to this and make a film slitter with your knife blade. Do this by pushing the knife blade through the box. The knife is now set to cut the film, the width of the window, as film is pulled from the box.
- Do not allow the film touch the ground as it comes out of the box. Contact with the floor can contaminate the film during the installation.
- For long windows, pull 14 the length of the window, roll the film, then do a second pull and roll again before cutting the film.
Remove the Release Liner
- Removing the release liner exposes the film adhesive. It is critical to work quickly and efficiently to reduce the possibility of contamination from airborne debris and dust.
- Before removing the liner double check that there is no air motion which could stir up and airborne dust. Turn off any ceiling fans and redirect any heating or air conditioning vents away from the working area if it wasn’t done when you prepared the area.
- Always wet the window you are about to do first before removing the liner. This reduces the amount of time the film adhesive is exposed to the air.
- A number of different techniques are used to separate the liner from the film.
- Use two pieces of masking tape and stick them together on the corner of the film. Pull them apart. The film will stick to one tape and the liner will stick to the other. The film must be dry to do this.
- Use your teeth. Take the corner, put it between your teeth and lightly grind your teeth together. The liner separates from the film.
- Place a finger under the film with the liner facing up. Use a knife blade to shave a piece to the liner off and expose the adhesive.
- Use a fingernail and pick at the edge of the film until the liner separates.
- When wetting the adhesives with the soap and water solution cover the
adhesive surface evenly and completely. Once the liner is removed, minimize
the time adhesive, especially pressure sensitive, is exposed to air.
HOW: To remove the release liner
- Wet a window near the window where you are going to apply the film. Place the film on the wet window with liner side away from the glass. The water on the glass will hold the film in place…
Or
- If two or more installers are on the job, one installer can hold the film for liner removal and wetting.
- When working alone the “reverse roll method can be used. This advance technique will be covered in class.
- Separate the liner from the adhesive.
- As the liner is being removed, wet the pressure sensitive adhesive thoroughly with a sprayer. Work from top to bottom using a side-to-side overlapping pattern. Control the spray pattern to give complete coverage of the adhesive. Failure to do this may cause premature sticking while trying to position the film or the possibility of creasing the film while squeegeeing. Wetting also reduces static electricity and dirt contamination of the adhesive. Use enough solution to wet the adhesive thoroughly, but not so much that it is flowing off the window.
Adhere the film to the glass
- Try to avoid installing film on hot glass. When you start the job, try to work so you avoid the worst of the day’s sun on the windows.
- Film is applied to glass by letting it fall naturally to the glass. Use gravity, don’t fight it.
HOW: To adhere film to glass
- Pull the film off the preparation window at a 45-degree angle, not at a 90- degree angle. Keep the film adhesive and the glass surface wet.
- Place the adhesive side of the film on the glass, starting at the top corners. If a factory edge is available butt the factory edge against the frame. Minimize movement of the film on the glass surface as much as possible.
Squeegee Film
- The film is squeegeed after the film is positioned on the window with the adhesive activated. The squeegee is used to squeeze all the mounting solution out from behind the film and to affix every square inch of film to the window surface. Diligent use of the squeegee is critical to a professional installation.
- The squeegee technique associated with mounting is different from the squeegee technique associated with cleaning. For mounting film, the squeegee technique is to push the water from the center of the film to the edge. Do not pull the squeegee. Only push!
HOW: To squeegee the film
- Check the position of all sides of the film before starting the squeegee passes.
- Spray the non-adhesive side of the film to prevent friction from the squeegee on the film surface.
- Set the top of the film by squeegeeing horizontally about 5 inches down from the top of the film.
- For the edges that will be trimmed, squeegee within 3 inches of the edge. Maintaining space from the edge prevents dirt at the edge of the frame from being sucked under the film.
- Repeat this process down the center of the window until the film sticks to the glass.
- Now you are ready to trim the film
Trim the Edges
- Trimming requires a trim guide and a knife with snap off blades. The trim guide should be 1/16 to 1/8″ thick. The recommended guide is the 5-Way Tool. This will automatically produce the required border. With practice, the same border can be achieved with proper use of the knife. This border is necessary to allow for water removal during squeegeeing and to prevent edge corrosion from moisture.
HOW: To trim the film
- Start in the upper right hand corner. With the film overlapped into the corner slice the film 45 degrees away from the corner on each side. This allows the film to lay down into the corner flat on the glass and prevents the film corners from creasing. This provides a starting point.
- Hold the trim guide at a firm right angle at the edge of the film/frame. Run the guide down the window edge. This temporarily sets the film against the glass and frame. This provides a crease that prevents snagging the film with the knife.
- Trim the film starting from the upper right hand corner with a very sharp blade. Hold the knife to the inside of the time guide and with smooth motion cut vertically down the window.
- Move trim guide and knife in a smooth motion down the window frame. Stop about six (6) inches from the bottom. Repeat the same corner slice used at the top and finish cutting to the corner.
- To cut the film without using the trim guide start using the same corner slice. Then, starting at the corner use a very short tip on the blade. Hold the knife perpendicular to the cut and turn the blade slightly out away from the frame of the window. Use your other hand to push the film up against the frame and cut down the side of the window. With practice you will be able to cut the film using just a knife.
Final Squeegee
- The final squeegee is a one of the most important steps in installing film. Once the film is secured to the glass and trimmed it is ready for this critical process.
Final Squeegee Technique
- Spray the film with solution to allow the squeegee to slide on the film.
- Starting from the top center, push the squeegee from the center toward the edge. This pushes the water to the edge of the film. Do not pull the water. Repeat the process on the other side.
- Repeat this same process all the way down the window. Keep the squeegee at a 45-degree angle and overlap each stroke to be sure water doesn’t flow up and over the top of the squeegee.
- Squeegee the window a second time to be sure all the water is removed. If you see water accumulating in front of the squeegee as you are pushing it across the film then more squeegeeing is needed.
Finishing Out
- Finishing out is the process of attending to the outside edges of the film by the frame. Drying the edges is the process of wicking (or absorbing) water and dirt into a paper towel and away from the edge of the film. Use approved lint-free paper towels. Some towels will scratch the window film.
HOW: To dry the edge
- Wrap the squeegee or the trim guide in soft clean lint-free paper towels.
- Bump trim guide slowly around the window frame, letting the paper towel absorb the water.
- As the final step is use a “chiseler” to go around the edges one last time to eliminate any water and lay the film fiat.
Final Check and Clean
- Once you have completed the installation stand and look at the window from the side to see if there is any water remaining. It is sometimes easier to discover water bubbles by looking from the side.
- Always wipe down the window lightly to remove any squeegee marks. Your day can be ruined if you have to return to a job only to find you did not do a final cleaning.
- It is also good policy to do one final check of all the windows once a job has been completed.
Splicing
- The availability of wider films makes it easy to avoid splices. In most cases a spice is not needed if the window is under 72 or 72 high.
- Splicing requires matching factory edge to the same factory edge. To match factory edge to factory edge the second piece of film is run “upside down” from the first. To keep track of the factory edge, mark it with a piece of tape as you are taking film from the box. There are two types of splicing techniques. With experience you will find the one that works for you.experience you will find the one that works for you.
- It is important to consider the location of the splice on the window surface. The objective is to keep the splice out of direct view. Splices are generally not made horizontally in the center of the window. A splice is normally done vertically. Try to position it so it may be hidden behind draperies when drawn open or as far to the edge as possible. A horizontal splice may make sense if it can be hidden under a cornice or if a splice near the top or even the bottom of the window keeps it out of view. Horizontal splices in commercial windows are somewhat less desirable as they do not stand up to cleaning motions of vertical squeegee techniques used by commercial window cleaners.
- Important: Be certain your customer is aware that a splice is needed. Allow the customer the choice of where the splice is to go. It can get expensive when a window has to be removed because the customer does not like the splice location.
HOW: To butt splice
- Match the factory edges of the film. Butt the two edges of the film together. Lay them very carefully up to one another perfectly. Slow squeegee in the same direction of the butt slice.
HOW: To overlap cut splice
- Overlap the second sheet of film over the first by about an inch, matching factory edges. With a sharp trimming knife and a straight edge, cut through the exact center of the overlap section. This cut must be straight.
- Remove the top piece of film.
- Lift the corner of the bottom panel. Spray with water under the film, and remove the small cut piece. Spraying with water reduces contamination an air entrapment.
- Slowly squeegee parallel to the overlap cut splice. This recommended method results in the least noticeable slice.
- The weather conditions outside or during installation are important. Film should not be installed on a hot window. It also is not recommended that film be installed on windows with glass temperature below 50° F. Cold temperatures can freeze the mounting solution to the glass, damaging the film.
- At the end of the installation there are a few details that will prevent follow-up calls from the customer and ease some of their concerns about the completed job
- Provide the customer with cleaning and maintenance instructions.
- Inspect the job with the customer.
- Explain that appearance will improve as it dries.
- Provide an estimate of drying time.
- Provide warranty information.
AFTER FILM IS INSTALLED
Film Dry-Out Time
- After installation trapped installation moisture can cause small water bubbles and/or a slightly cloudy look. This is normal and should be expected. Do not attempt to pierce a water bubble during the dry-out period. Water bubbles and a cloudy look will eventually dissipate. Attempting to pierce a water bubble in an effort to drain moisture will damage the film. This damage is not covered by the warranty.
Climate Conditions & Dry-Out Time
- Cold and non-sunny weather conditions can lengthen the dry-out time. Warm weather and direct sun light exposure will shorten the dry-out time. Do not become alarmed by slow drying. The trapped moisture will dry-out completely. Safety and security films always have a longer dry-out period due to increased thickness of the film. Thicker films and less than perfect drying climate will lengthen the dry-out period. Dry-out times can vary from a few days to as much as 6 months. Film type and climate conditions will determine the dry-out period you experience.
WINDOW FILM CARE & MAINTENANCE
- To obtain maximum service life from window film, follow instructions for care and
maintenance.
Cleaning
- Window film should not be cleaned for 30 days after installation. This secures curing of the mounting adhesive to the glass.
Cleaning Solutions
- Most glass cleaners will work well although a good economical cleaning solution for window film is 1/2 ounce of liquid dish soap added to 1 quart of fresh water.
Cleaning Materials
- Always use fresh clean soft materials to wash and dry window film surfaces. A soft cloth or a clean synthetic sponge is recommended for washing the window film followed by another clean soft cloth or soft rubber squeegee for drying.
- To avoid scratching the film, do not use bristle brushes, abrasive scrubbing sponges, or any cleaning materials that may have been contaminated with dirt particles, as is commonly the case when washing interior and exterior windows with the same cleaning materials. Some brands of paper towels are coarse enough to put fine scratches in the film, even films with Durogard protective hard coat finish. While these scratches may
be too thin to be seen at the beginning, they can damage the polished look of the film over time.
Cutting Ddge Tools
Objective :
- To understand which tools are needed to achieve professional results and how to use them.
Why use the right tools?
- The right tool for the job saves:
-Time
– Money
- Improves installation
- Why use the right tools?
- Tools save time, money and improves installation quality.
- Having the right tool at the right time, makes professional results a snap
Tool List
- Drop cloth
- Window cleaning squeegees
- Installation squeegees
- Card squeegees
- Scraper and blades
- Scrubbie pads
- Knife / snap off blades
- Spray bottles
- Large sprayer
- Pressure sprayer
- 5-way tool
Drop Cloths
- Protects customers furnishings
- Lets customer know you respect their property
- Why; To protect the customers furnishings and floor from the water and solutions used in installation.
- Types In Catalogue: Canvas – Solar Gard or Panorama
- Tips for use :
- Using a drop cloth lets the customer know you care about their furnishings.
- Use caution when using ladders on drop cloths. The drop cloth can tangle around the base of the ladder when it is being moved.
- Keep your drop cloths clean. You will need to wash them frequently. This may mean you need to buy extras.
Cleaning Squeegee
- Clean and dry windows
- When cleaning, pull the squeegee
- Tool: Cleaning Squeegees
- Why: To clean windows and dry windows
- Type: Pro SS Squeegee 6-12″, handles and blades
- Tips for use:
- When cleaning windows, pull the squeegee from one side of the window to the other. This moves the dirt away from the middle and to the edges.
Installation Squeegees
- To press film onto window and eliminate water
- When removing water: pull the squeegee
- Tool: Installation Squeegees
- Why: To press film onto window and eliminate water from behind the film.
- Type: Blue &. Clear Max, 6-8″ Aluminum Squeegee, Wood & Gold Metal Squeegee
- Tips for use:
- When eliminating water push the squeegee toward the window edge.
- These squeegees take the pressure needed to adhere the film to the glass.
- As long as it is clean, the squeegee will not tear the film
Card Squeegees
- To push water from edges
- Used in finishing off the edge of the film at the frame
- Tool: Card Squeegees
- Why: To push out water from the edges as well as to secure the edges of the film
- Type: 4″ Blue and Gold, PVC, Nylon,Teflon & Little Chizler
- Tips for use:
- Used in finishing off the window edge by wrapping with a paper towel and pushing toward the edge to soak up water. The Little Chizler works well to lay down the edges of the film.
Scrapers and Blades
- To remove particles or old film adhered to the glass
- When using on glass, wet glass and hold at 45° angle
- Tool: Scrapers and blades
- Why: To clean the glass and to remove old film
- Type: Retractable Blade Scraper, Plastic Scraper, 4″ Heavy Duty Scraper, 6″ Triumph Scraper,
- Tips for use:
- 4″ Heavy Duty Scraper is used to clean caulk & silicone from around the edges of the windows.
- Other scrapers are used to clean the glass itself.
- Be very careful when using any of these tools.
- Always place covers on blades.
- If covers are not available, put away immediately when you are done Blades must be sharp with no rust.
Scrubbies
- Used to remove stubborn dirt In window cleaning
- Used with cleaning solution to remove grime
- Tool: Scrubbie Pad
- Why: To remove stubborn dirt in window cleaning
- Type: Scrabbles
- Tips for use:
- Use with window cleaning solution to remove grime from window.
- Use with scrapers on very dirty windows or on windows where the scrapers may damage the glass.
Knife With Snap Off Blade
- Used to cut film
- Only use stainless steel blades
- Heavy duty knife for 10-mil and greater
- Tool: Knife with snap off blades
- Why: To cut film
- Type: Olfa 8 point regular and heavy duty, NT, Economy
- Tips for use:
- Only use stainless steel blades when possible.
- Use regular knives for up to 8-mil film, heavy duty knives for 10ml and thicker.
- Dispose of used tips properly.
Spray Bottle
- Used to spray a fine mist
- Use a different bottle for:
– cleaning solution
– mounting solution
– clear water
- Tool: Spray bottle
- Why: To spray a fine mist of cleaning solution, mounting solution, or clear water. Use a separate bottle for each liquid.
- Type: 32 Ounce Spray Bottle with Trigger
- Tips for use:
- Used mostly for automobile installation or small windows.
Large Sprayer
- Used like the smaller sprayer, but holds more solution
- Better for architectural installation
- Tool: Large sprayer
- Why: A higher volume sprayer.
- Type: 2.5 Hand Held Pressure sprayer
- Tips for use:
- Do not over pump the sprayer.
- Adjust nozzle to spray a medium mist and spray the window and the film from side to side being sure to cover all areas without allowing the water to flow down.
Pressure Sprayer
- To wet film and windows
- Especially useful for large jobs
- Tool: Pressure sprayer
- Why: To wet film and windows, especially useful for large jobs.
- Type: 3 Gallon Pressure Sprayer with Hose
- Tips for use:
- Do not over pump the sprayer.
- Adjust nozzle to spray a medium mist and spray the window and the film from side to side being sure to cover all areas without allowing the water to flow down.
5-Way Tool – Trim Guide
- Used to cut smooth edges
- Used to dry film at frame
- To dry film, wrap with a paper towel
- Tool: 5-way Tool – Trim guide
- Why: To use as a guide for cutting smooth trimmed edges and when wrapped with a paper towel to dry the edges at the frame.
- Types In Catalogue: 5 Way Tool, 8″ & 12″ Aluminum trim guide.
- Tips for use:
- Wrap paper towel around tool and go around the edges of the window where the frame meets the glass.
Ladders
- The Little Giant is versatile and worth the investment
- Tool: Ladder
- Why: To reach hight windows
- Type: Little Giant Ladder
- Tips for use: Little
- Giant Ladder is a must.
- It can be used in many applications where multiple ladders would be needed.
- Do not use botties when on a ladder. Instead consider a pair of sneakers used only for the interior of jobs and keep them clean.
INSTALLATION
The First Step – Measuring and Calculating
Unlocking the the secret to professional installation
OBJECTIVE :
- The objective is to learn (or perfect your skill) to apply window film to Architectural Glass using Tint Depot, Inc. endorsed methods of installation. You will learn to use the right tools for the job and how to maximize your installation efficiency.
What We Will Learn
- Measuring and calculating
- Selecting the right tools
- Preparing the work area
- Preparing the window and glass
- Cutting
- Hanging and trimming
- Measuring and calculating film use
– Laying out film and window size
– Linear vs. square foot
– Width vs. cost
– Minimizing material waste
– Pricing the job
- Select the right tools for the job
– Site and window preparation tools
– Film cutting tools
– Trim guides and measures
– Spray bottles
– Application solution
- Before leaving the shop
– Prepare the customer
– Inspecting the film
– To pre-cut or not
- Preparation of area and window glass
– Dry scraping
– Wet cleaning
– Wet preparation
- Cutting the film
– Methods
- Handling and hanging the film
– Handling
– One-man reverse roll
– Hanging
– Trimming
– Squeegee
Learn Your Craft Well
- Developing professional installation skills is critical to the success of your business
- Learning the craft of installing window film is critical to the success of your business.
- Your future is built on your past.
- By hanging the Tint Depot professional quality window films perfectly, your customer will receive a product that will bring him or her satisfaction and you referrals.
Measuring and Calculating
- Film is generally priced to the customer in square feet
- Bought from the manufacturer in linear feet
- Measuring, calculating film requirements and reducing material waste when undertaking an installation maximizes profit on a project.
- To a newcomer it can seem very confusing
- Installation is generally priced to the customer per installed square foot of window film
- Film is purchased from the manufacturer by the linear foot on a roll.
Film Width
• Architectural film
Width Length Sq. Ft in 100′ Roll
36 Inches 100 feet 300 square feet
48 inches 100 feet 400 square feet
60 inches 100 feet 500 square feet
72 inches 100 feet 600 square feet
• Standard Pricing -100′ roll
- Architectural window film is available In standard rolls that are 36″, 48″, or 60″ wide.
- In addition, some dry adhesive films and some clear safety films are available in 72″ widths.
- The standard pricing is for 100 linear feet of film. Therefore, a roll of film that is 36″
Width Length Sq. Ft in 100′ Roll
36 Inches 100 feet 300 square feet
48 inches 100 feet 400 square feet
60 inches 100 feet 500 square feet
72 inches 100 feet 600 square feet
Using Film Width to Your Advantage
60″ film roll 36″ film roll
29″ windows 29″ window
29″ windows cut down the entire length of a 100 ft roll saves 41″ square feet when cut from a 60″!
- When purchased by the roll, film is generally less expensive per square foot the wider it is.
- If you are doing a very large job it may be more economical to buy wider film and cut it.
- For example:
- if you are doing windows that are 29 inches wide,
- 36 inch film and cut the film to 29 inches, strip of wasted film 7 inches wide all the way down the length of the film. For 100 foot roll that means there is a total of 58 square feet being wasted.
- Cut from 60″ film, there would be only 2″ of wasted film down the length of 100 feet of film. The waste would be down to about 17 square feet of film.
- In addition, wider rolls cost. .$.08 less per square foot.
Film is Non-directional
- It does not matter which way the window is cut from the roll.
- For example: 20″x 40″ windows
- When planning how to lay out film for a job — consider that it does not matter which way the film for the window is cut from the roll
- Except for splicing
- If you have a window that is 84″ wide and 59″ high, you don’t need to despair that film does not come wider than 84″. Just use 60″ wide film and run it out for 84″ to get the length of the window.
- The above example: Three 20″ by 40″ windows may be cut from a 60″ roll in either of two ways:
How to Measure Windows
- Use a 1″ X 25″ retractable tape
- Begin thinking in roll widths
- Measure consistently
– Most measure width first
– Record measures on a work order
- Use a 1″ X 25′ retractable tape measure.
- Stiff tape measure allows you to measure above your head and beyond the reach of your arms.
- This will be sufficient to measure most of the jobs you will encounter including high windows.
- In measuring windows, consistency leads to accuracy.
- It is you measure and document the width first
- Width = thinking roll widths.
- Stay sonsistency
- When measuring glass area, measurements within an inch or so will be fine, just don’t cheat yourself in width. A window you measure at 35 1/2″ better not be over or the 36″ roll you have purchased will network.
- Record all your measures on a work order.
- Creates a worksheet for you to do calculations
- Provides basis for your proposal/estimate for the customer.
While measuring…also record
- Window type
- Pre-existing defects or damage
- Furniture, window treatments that need to be moved
- The need for ladders
- Special tools or situations
- While at the site measuring determine and record:
- Window type, (single pane, tempered, double, etc.)
- Defects or damage (scratches, cracks, or any type of defects) in the window.
- Furniture, window treatments and household items that need to be moved.
- The need for ladders,
- Special tools or situations that require special attention.
- Be certain to go over and leave this information with the customer.
Calculating Square Feet
- The formula:
Total Square Feet = (width X height)/144 x number of panes
Instructor:
- Go carefully through the formula:
- Total Square Feet = (width x height) /144 x number of panes
Calculating Square Feet
- Our hypothetical situation
Window Type No. of Windows Panes per Window Total Panes Width Height
Sliding Glass Doors 3 2 6 44 76
Casements 4 4 16 27 55
Awning 3 4 12 33 13
French 2 15 30 6 12
- We will use a hypothetical situation as an example to calculate:
- Square feet for the job (way it is priced)
- Linear feet of film required for the job (the way film is sold to you)
- Laying out the windows to be cut.
Sliding Glass Doors
44″ X 76″ = 3,344 sq. Inches
3,344″ 1144 sq. inches = 23.2 sq. ft
23.2 X 6 panes = 139.3 square feet
Instructor:
- Carefully explain that there are three sets of doors with each pane being 44″ x 78″.
- Go carefully through the formula and calculation
Casement Windows
27″ X 55″ = 1485 sq. inches
1485 ” /144 sq. inches = 10.3 sq. ft.
10.3 sq. ft. X 4 panes = 41.2 sq. ft.
Instructor:
- Carefully explain that there are four casement windows with each pane being 44″ x 78″.
- Go carefully through the formula and calculation
Awning Windows
33″ X 13″ = 429 sq. inches
429″ /144 sq. inches = 2.97 sq. ft. (use 3 sq. feet)
3 sq. ft. X12 panes = 36 sq. ft.
Instructor:
- Carefully explain that there are three sets of awning window.
- Each is made up of four panes. The three sets have a total of 12 windows. Each pane is 13″ x 33″.
- Go carefully through the formula and calculation
French Panes
6″ X 12″ = 72 sq. inches I
721144 sq. inches = .5 sq. ft. .5
sq. ft. X 30 panes = 15 sq. ft.
Instructor:
- Carefully explain that there are two sets of french doors each with 15 small windows. Each of the windows is 6″ x 12″.
- Go carefully through the formula and calculation
Job Total
Window Type Total Square Feet
Sliding Glass Doors 140
Casements 41
Awning 36
French 15
Total 233
Instructor:
- Go carefully and slowly to show where each of the totals come and how you arrive at the grand total.
Determining Linear Feet
- Using roll sizes nearest the window size saves time and film handling
- Other options may save material and/or job costs
- In determining linear feet consider how you will be cutting the film from the roll.
- Using roll widths closest to the width of the window saves on film handling and usually cutting.
- Other options for film layout may well save material and job costs.
Sliding Glass Doors
- From the example widows, since the length of the sliding glass doors, 76″, is wider than any roll width, the best option is a 48″ width roll for the 44″ wide panes and run them lengthwise.
- In calculating the linear feet, we add the length of all the windows that are cut from this size roll of film.
- The doors will take 38 linear feet of film.
- To calculate the square feet of film used for the doors, we must include the waste
- Multiply the linear feet times the width of the roll which equals 152 square feet of film.
- Remember from the above the square feet of the window was 140 sq. ft.
Casement Windows
- Three options for laying out the casement windows.
- Side by side on a 60″ roll, there will be 6 inches of waste or 3″ on each side of the roll.
- Cut side-by side, take the length of the windows times 2 for the linear feet of film.
- 110 inches or 9.2 linear feet.
- The square feet of film used is then 9.2 linear feet times roll width or 5′ = 46 square feet of film.
- Across the 60″ roll we end up with 5″ of waste down the roll.
- Use the width of the window to calculate linear feet
- Multiply the width of the window, 27″ times 4 windows for a total of 108″ or 9 linear feet.
- Reduces the square footage to 44 square feet of film.
- While this does not sound like much savings for 4 windows, it becomes really significant in an office building with 2000 windows. — or 1,000 sq. ft. film.
- To minimize handling of film, or to reduce the number of roll sizes needed ~ cut lengthwise from a 36″ roll of film.
- 220 linear inches for the four 55″ casements, or 18 linear feet of film or 55 sq. ft. of film
- While this is 20% more film, and the 36″ roll size costs more per square foot, if it is faster for the installer to hang the film in the long run this could be the best option.
Awning Windows
- For the 33″ awning windows, cut the width of the window out of a 36″ roll of film. This is a very simple set of windows to cut.
French Panes
- French panes are small. So they are cut from the film side by side.
- In this case, each window is 6″ x 12″, these work best cut from a 36″ roll with 3 cut side by side or across.
- Since there are 30 of these panes there would be 10 rows of three across on a 36″ roll.
When Purchasing Film
- Standard length 100′
- Available In cut sizes
– 75 linear feet
– 50 linear feet
– 25 linear feet
– Roll cutting charge
- In addition o 100 foot standard rolls, film may be purchased in rolls of 75, 50 or 25 feet.
- There is a charge for cutting the roll.
For Our Job
- 48″ film
– Sliding glass doors
– 38 linear feet
– Requires 50 foot roll
- 36″ film
– Casements, awnings, French
– Combine for 37 linear feet
– Requires 50 foot roll
- Back to our example
- This job is done out most efficiently on at least two different roll sizes. 48″ for the sliding doors and at least a roll of 36″ for the rest of the job.
- If we were to purchase just the two rolls we need
- 50 foot roll of 48″ wide film for the 38 linear feet of material needed for the sliding glass doors.
- Remainder of the job could be done with 36 inch material. This would require- 18 linear feet for the casements, 13 linear feet for the awnings and 5 linear feet for the French Panes.
- The total linear feet is 37 feet. Again this means we have to purchase a minimum of a 50 foot roll.
INSTALLATION PROCEDURES
Maximizing your skills
Objective :
- To maximize film handling, cutting and hanging skills. Special emphasis will be given to squeegee techniques.
What we will cover :
- Pre-cut vs. site cut
- Preparation
- Preparing the window and frame
- Rough cutting film from roll
- Removing the release liner
- Adhering the film to the glass
- Squeegeeing
- Trimming
- Final Squeegee
- Finishing out
- Splicing
Before leaving the shop . . .
- Call to confirm
– Time
– Directions
- Check what you have packed
– Film type, size, quality
– Tools
- Prepare the customer,
– Leave the Installation Preparation Checklist when the job is sold. Customer will know what to do, and may actually do it!
– If those items are not done, the use of the checklist provides to charge for such services.
- If possible have the customer:
– Provide access to window
– Remove all items from sills, furniture, window treatments.
– Remove all pets.
- Double-check, saves coming back
- Before leaving the shop,
-call to confirm time and directions
-Confirm: .Film type, film size, film quality
- TOOLS (Drill, screwdrivers, hammer, ladders, etc.)
To pre-cut or not…
Advantages
- Save film
- Improve inventory control
- Impress customer
Disadvantages
- Takes more time
- Could cut wrong sizes
- Could run short at the site
- You may want to consider pre-cutting in the shop rather than on the job site.
Preparation Pays
- Inspect windows with customer
- Check glass type to see if right film is being used
- Before beginning job:
– Move furniture and Items from sills
– STOP AIRFLOW
- Take a few minutes to inspect all windows with the customer before the installation begins.
– Determine if flaws exist in the glass.
– Make certain there is no dispute later about whom might have caused those flaws. Note broken glass, loose panes and/or any imperfections in the glass.
– Be certain the customer knows what will happen with stickers, alarm systems and/or any other items that affect the Installation.
– Note with the customer, if the building or home has a history of glass breakage and/or IG unit seal failure.
- If the customer has not done the actions in the Installation Checklist, the installer will have to do them before beginning the job.
- Stop airflow. Air conditioning and heating vents are closed or are not blowing in the direction of the work area. Ceiling fans off.
Set-up work Area
- Make a work space
– Free access to windows
– Target a work surface window
– Establish a waste area
- Drape the area
- Set up your tools
- Set up your work area.
- Target a large window as your work surface window for more efficient film handling.
- Select an out of the way area for waste. Place the liner from the first window here and put the rest of the waste on top of it. Waste can be rolled rolled ball and taped closed using a scrap piece of film.
- Drape the area. Lay down drop cloths to protect the customer’s carpet.
- Get your tools set up.
- Make sure you have new and clean blades in your scrapers and only Stainless Steel snap off blades for your knife.
Installation Procedures
- Basic Steps
– Clean window
– Cut film
– Adhere film to glass
– Trim and finish
- A clean window is most important for a professional film installation.
- lean the frame to prevent dust or dirt moving from the frame onto the glass surface when you are hanging film.
- Dirt migrating from the frame is a film installer’s nightmare. Each piece of dust trapped under the film shows when caught by the light.
Preparing Window and Frame
- First clean the frame
- Dirt from frame migrates to film during installation
- Each piece of dust trapped under film is caught by the light.
- A clean window is most important for a professional film installation.
- Clean the frame to prevent dust or dirt moving from the frame onto the glass surface when you are hanging film.
- Dirt migrating from the frame is a film installer’s nightmare. Each piece of dust trapped under the film shows when caught by the light.
How to Clean the Frame
- Remove all caulking from edge of glass
– May need to cut away
– Old caulk, do not wet first
– New caulk, wet first
- Wipe all parts of the frame with light solution of mild detergent
- Remove all caulking, silicone, or dirt from the edges of the glass.
- Use a knife and break the bond between the caulk/silicone and the window frame.
- Then, use a razor scraper and scrape the caulk off the glass.
- If the windows are old and the caulk is brittle, do this dry and wipe the caulk away using a brush or a hand held vacuum.
- For new windows with soft caulk, do this wet.
- Wipe all parts of the frame, including the sashes, stops, jambs and casing with a damp cloth and a light solution of mild detergent
Scrape the Window
- Removes foreign particles from window
- Use of larger razor tools
– reduces the time to scrape
– are harder to handle
- If there are any foreign particles that are adhered to the glass, they must be removed before installing film.
- Scraping a very wet window with a razor tool, is an excellent way to remove debris from the window.
- Remember the larger your tool, the harder it is to handle, but the more your cleaning time will be reduced.
How to Scrape the Window
- Re-spray the surface of the glass
- Keep razor at 45° angle
- Work in smooth overlapping strokes
- Keep window wet to prevent scratching
- While the window is wet, re-spray the surface.
- Use the scraping razor tool of your choice to scrape the window.
- Keep the tool at a 45° angle and work in smooth, overlapping strokes.
- It is very important that you keep the window wet to prevent scratching the glass
Cleaning the Window
- After scraping, the final debris needs to be removed
- Use cleaning solution and scrubbie to cut through any haze left by cleaning products or smoke
- After scraping the glass and cleaning the frame and sill, the entire glass surface must be washed.
How to Clean the Window
- Use a solution of a few drops of soap in a quart of water
- Spray a mist over window
- Use a scrubbie to remove all debris left by scraping
- Clean the window by spraying with a solution of a few drops of soap in a quart of water.
- To remove any debris left by the razor tool use a scrubbie to go over the surface of the window.
Squeegee the Window
- Use cleaning squeegee
- Removes remaining soil and dries the glass
- Once the window Is scrapped it is most important to squeegee the window down to remove any remaining soil and dry the glass.
How to Squeegee the Window
- Re-spray with soap and water
- Use a large window squeegee
– start from the top
– Pull squeegee all the way across. Do not stop.
– Wipe the squeegee with a paper towel
– Complete window
– Wipe edges with paper towel
- Re-spray the window with the soap and water solution.
– Coat the glass but do not let it run down in streams.
- Use a large window squeegee and starting from the top, squeegee completely across the window from one side to the other.
– Do not stop in the middle.
– Use a paper towel to wipe the squeegee clean and repeat the process, working down the window.
- Once all the water is removed wipe the edges around the window with a paper towel to remove any remaining dirt.
Rough-cut Film from Roll
- Rough-cutting brings material to size for handling
- Check measurements
- Methods
– Blade in box
– Cutting table
– Film Handler
- This Is referred to as the rough-cut. Before cutting film, remeasure the window.
- Do not rely on previous measurements.
- After the rough-cut material will be easier to handle.
- There are several ways to do this including:
– pulling from the box with a 8-point blade set in the box as the cutting blade
– cutting table
-“Film Handler”.
- The “Film Handler” is an ideal piece of equipment used to hold the roil while razor blades are place on a guide. This performs the cutting and measuring as the film is dispensed from the roll.
How to Rough-cut
- Measure width and height
- Use one of the three cutting methods
- Keep film from touching floor
- For long windows
– pull Va the length of the window
– roll up
– pull the last Va from the box
- Measure the width and the height of the glass.
- If rough cutting when pulling from box
– Use a tape measure from the edge of the film roll across the roll to the proper width of the window.
– Add 1/2 inch to this and make a film slitter with your knife blade.
– Do this by pushing the knife blade through the box. The knife is now set to cut the film, the width of the window, as film is pulled from the box.
- Do not allow the film touch the ground as it comes out of the box. Contact with the floor can contaminate the film during the installation.
- For long windows, pull 14 the length of the window, roll the film, then do a second pull and roll again before cutting the film.
Remove Release Liner
- Exposes the film adhesive
- Work quickly to reduce contamination
- To separate liner from film
– Two pieces of masking tape
– Teeth
– Knife blade
– Fingernail
- Removing the release liner exposes the film adhesive. Work quickly and efficiently to reduce the possibility of contamination from airborne debris and dust.
- Before removing the liner double check that there is no air motion which could stir up and airborne dust.
- Always wet the window you are about to do first before removing the liner. This reduces the amount of time the film adhesive is exposed to the air.
- A number of different techniques are used to separate the liner from the film.
- Use two pieces of masking tape and stick them together on the corner of the film. Pull them apart. The film will stick to one tape and the liner will stick to the other. The film must be dry to do this.
- Use your teeth. Take the corner, put it between your teeth and lightly grind your teeth together. The liner separates from the film.
- Place a finger under the film with the liner facing up. Use a knife blade to shave a piece to the liner off and expose the adhesive.
- Use a fingernail and pick at the edge of the film until the liner separates.
- When wetting the adhesives with the soap and water solution cover the adhesive surface evenly and completely. Once the liner is removed, minimize the time adhesive, especially pressure sensitive, is exposed to air.
How to Remove the Liner
- Wet a work window
- Wet the window to be filmed
OR - Use one person to hold, one to pull
- Wet a window near the window where you are going to apply the film. Place the film on the wet window with liner side away from the glass. The water on the glass will hold the film in place…
Or - If two or more installers are on the job, one installer can hold the film for liner removal and wetting.
- When working alone the “reverse roll method can be used. This advance technique will be covered in class.
- Separate the liner from the adhesive
Removing the Liner
- Wet pressure adhesive as you work
- Spray top to bottom
- Control the spray
- Wetting
– Prevents premature sticking
– Reduces contamination and static electricity
- As the liner is being removed, wet the pressure sensitive adhesive thoroughly with a sprayer.
– Work from top to bottom using a side-to-side overlapping pattern.
– Control the spray pattern to give complete coverage of the adhesive. Failure to do this may cause premature sticking while trying to position the film or the possibility of creasing the film while squeegeeing.
- Wetting also reduces static electricity and dirt contamination of the adhesive. Use enough solution to wet
Adhere the Film to the Glass
- Try to avoid hot glass
- Film is applied by letting film “fall naturally” onto the glass.
- Try to avoid installing film on hot glass. When you start the job, try to work so you avoid the worst of the day’s sun on the windows.
- Film is applied to glass by letting it fall naturally to the glass. Use gravity, don’t fight it.
How to Adhere the Film
- Pull the film off the preparation window at a 45° angle
- Place adhesive side toward glass
- Start at the top corner, one factory edge against the frame
- Pull the film off the preparation window at a 45 degree angle, not at a 90- degree angle.
- Keep the film adhesive and the glass surface wet.
- Place the adhesive side of the film on the glass, starting at the top corners.
– If a factory edge is available butt the factory edge against the frame.
– Minimize movement of the film on the glass surface as much as possible.
Squeegee
- After film is placed on window
- Used to squeeze the mounting solution out from behind the film
- Affixes every square inch of the film to the glass
- Push water from center to edge
- The film is squeegeed after the film is positioned on the window with the adhesive activated.
- The squeegee is used to squeeze all the mounting solution out from behind the film and to affix every square inch of film to the window surface.
- Diligent use of the squeegee is critical to a professional installation.
- The squeegee technique associated with mounting is different from the squeegee technique associated with cleaning.
- For mounting film, the squeegee technique is to push the water from the center of the film to the edge. Do not pull the squeegee. Only push!
How to Squeegee
- Check position of all sides of film
- Spray water on non-adhesive side to prevent friction
- Set top of film by squeegeeing horizontally 5″ from top.
- For edges to be trimmed, squeegee within 3″
- Repeat down center of the film
- Check the position of all sides of the film before starting the squeegee passes.
- Spray the non-adhesive side of the film to prevent friction from the squeegee on the film surface.
- Set the top of the film by squeegeeing horizontally about 5 inches down from the top of the film.
- For the edges that will be trimmed, squeegee within 3 inches of the edge. Maintaining space from the edge prevents dirt at the edge of the frame from being sucked under the film.
- Repeat this process down the center of the window until the film sticks to the glass.
- Now trim
Trim the Edges
- Establishes a border around the film
– allows for water removal during squeegee
– prevents edge corrosion
- Trimming requires
– a trim guide
– knife with snap off blades
- A border is necessary to allow for water removal during squeegeeing and to prevent edge corrosion from moisture.
Trimming requires a trim guide and a knife with snap off blades.
– The trim guide should be 1/16 to 1/8″ thick.
– The recommended guide is the 5-Way Tool. This will automatically produce the required border.
- With practice, a border can be achieved with proper use of the knife.
How to Trim the Edges
- Start in upper right corner
- Slice the film 45° away from corner
- Hold trim guide at firm right angle to film
– run guide down window, In a smooth motion
- Repeat from next corner
- Start in the upper right hand corner.
– With the film overlapped into the corner slice the film 45 degrees away from the corner on each side. This allows the film to lay down into the corner flat on the glass and prevents the film corners from creasing. This provides a starting point.
- Hold the trim guide at a firm right angle at the edge of the film/frame. Run the guide down the window edge. This temporarily sets the film against the glass and frame. This provides a crease that prevents snagging the film with the knife.
- Trim the film starting from the upper right hand corner with a very sharp blade. Hold the knife to the inside of the time guide and with smooth motion cut vertically down the window.
- Move trim guide and knife in a smooth motion down the window frame. Stop about six (6) inches from the bottom. Repeat the same corner slice used at the top and finish cutting to the corner.
- To cut the film without using the trim guide start using the same corner slice. Then, starting at the corner use a very short tip on the blade. Hold the knife perpendicular to the cut and turn the blade slightly out away from the frame of the window. Use your other hand to push the film up against the frame and cut down the side of the window. With practice you will be able to cut the film using just a knife.
Final Squeegee
- One of the most critical steps
- Film must be secured to glass and trimmed first
- The final squeegee is a one of the most important steps in installing film.
- Once the film is secured to the glass and trimmed it is ready for this critical process
How to Final Squeegee
- Spray the film
- Start at top center
– Push water toward edge
– Repeat on the other side
- Repeat all the way down
- Keep squeegee at 45° angle
- Overlap each stroke
- Squeegee a second time
- Spray the film with solution to allow the squeegee to slide on the film.
- Starting from the top center, push the squeegee from the center toward the edge. This pushes the water to the edge of the film.
- Do not pull the water. Repeat the process on the other side.
- Repeat this same process all the way down the window.
- Keep the squeegee at a 45-degree angle and overlap each stroke to be sure water doesn’t flow up and over the top of the squeegee.
- Squeegee the window a second time to be sure all the water is removed.
- If you see water accumulating in front of the squeegee as you are pushing it across the film then more squeegeeing is needed
Finish out
- This process tends to the outside edges
– adheres
– dries
- Drying the edge is the process of wicking water away from film and into a paper towel
- Finishing out is the process of attending to the outside edges of the film by the frame.
- Drying the edges is the process of wicking (or absorbing) water and dirt into a paper towel and away from the edge of the film.
- Use approved lint-free paper towels. Some towels will scratch the window film.
How to finish out
- Wrap the trim guide in a soft lint-free paper towel paper towel
- Bump slowly around the window, letting the towel absorb the water
- Use a chiseler to go around the edges to eliminate the water and lay the film flat
- Wrap the squeegee or the trim guide in soft clean lint-free paper towels.
- Bump trim guide slowly around the window frame, letting the paper towel absorb the water.
- As the final step is use a “chizler” to go around the edges one last time to eliminate any water and lay the film flat.
Final Check and Clean
- Stand back and look
– Look for water bubbles
– View the window from the side
- Wipe down the window to remove squeegee marks
- Once job is complete, make a final inspection with customer
- Once you have completed the installation stand and look at the window from the side to see if there is any water remaining.
– It is sometimes easier to discover water bubbles by looking from the side.
- Always wipe down the window lightly to remove any squeegee marks. Your day can be ruined if you have to return to a job only to find you did not do a final cleaning.
- It is also good policy to do one final check of all the windows once a job has been completed.
Splicing
- Wider films help avoid splices
- Requires matching factory edge to factory edge
- Consider the location of the splice – avoid the middle
– under a window treatment
– out of the line of sight
- Be certain customer knows there will be a splice
- The availability of wider films makes it easy to avoid splices. In most cases a spice is not needed if the window is under 72″ or 72″ high.
- Be certain your customer is aware that a splice is needed.
– Allow the customer the choice of where the splice is to go
- Splicing requires matching factory edge to the same factory edge.
– To match factory edge to factory edge the second piece of film is run “upside down” from the first.
– To keep track of the factory edge, mark it with a piece of tape as you are taking film from the box.
- It is important to consider the location of the splice on the window surface.
– Keep the splice out of direct view. Position it so it may be hidden
behind draperies
– A splice is normally done vertically. A horizontal splice may make sense if it can be hidden
– Horizontal splices in commercial windows are less desirable as they do not stand up to cleaning motions of vertical squeegee techniques used by commercial window cleaners.
How to Splice
- Butt splice
– two factory edges are perfectly against one another
- Overlap cut splice
– one sheet over the first by 1″
– cut down center of overlap
– remove the top piece
- BUTT Match the factory edges of the film.
– Butt the two edges of the film together.
– Lay them very carefully up to one another perfectly.
– Slowly squeegee in the same direction of the butt slice.
- OVERLAP the second sheet of film over the first by about an inch, matching factory edges.
– With a sharp trimming knife and a straight edge, cut through the exact center of the overlapped section.
– This cut must be straight.
– Remove the top piece of film.
– Lift the corner of the bottom panel. Spray with water under the film, and remove the small cut piece. Spraying with water reduces contamination and air entrapment.
– Slowly squeegee parallel to the overlap cut
At the end…
- Provide customer with care instructions
- Inspect job with customer
- Explain appearance Improves with drying
- Provide an estimate of drying time
- Provide warranty Information
- The weather conditions outside or during installation are important.
– Film should not be installed on a hot window.
– It also is not recommended that film be installed on windows with glass temperature below 50° F.
– Cold temperatures can freeze the mounting solution to the glass, damaging the film.
- At the end of the installation there are a few details that will prevent follow-up calls from the customer and ease some of their concerns about the completed job.
- Provide the customer with cleaning and maintenance instructions.
- Inspect the job with the customer.
- Explain that appearance will improve as it dries.
- Provide an estimate of drying time.
- Provide warranty information.