Instructions for Window Film and Tint Installation

Instructions for DIY Window Tint Installation
People tint their cars for a variety of reasons. If you live in a hot state, sometimes the sun can be brutal and it’s nice to shade it out a bit with some tint. You may have a medical condition that gets triggered by intense sunlight, like lupus or arthritis. You may want some privacy, or maybe you just think a good tint job looks awesome. Regardless of your reasons for tinting your car, you can do it yourself with the correct materials, prep-work, and techniques.
Window tinting is done by taking a film (usually made from polyethylene terephthalate or “PET”) and adhering it to the glass with adhesive. Some cars can be really simple to tint, whereas others require a lot of expertise and skill. Tinting film needs a smooth, immaculately clean surface to stick to, so sometimes older cars can be very difficult because of scratches or old grime and dirt. On the other hand, a brand new model might just need a quick squeegee. Usually, the film is shaped and sized on the outside of the glass, and then installed on the outside of the glass.
Before you tint your car, consider whether or not it’s worth it to do it on your own. A professional tinter can give you quick, beautiful results that come with a warranty. That being said, there’s nothing wrong with being self-sufficient or learning a new skill, so let’s go through the process of tinting your car on your own.

Can I tint the glass on my car?
Once you’ve got an idea of how dark you want your tint to be, take a look at your glass and see how easy it’s going to be to tint. If it has cracks or chips, it shouldn’t be tinted. If it’s already got tint on it, remember that you’ll have to remove that first. Very old film can be a huge headache to get off. In certain situations, if the glass is in horrible condition or has a 20-year-old film stuck to it, it will be better to simply replace the glass altogether.
You don’t want to spend a ton of time preparing your glass and then tinting it only to see bubbles and creases in your tint job. This can be caused by chips or leftover debris you missed earlier. Save yourself the time and stress and be honest about whether or not you can do a good tint job on it.
My windows have old tint on them, how do I get it off?
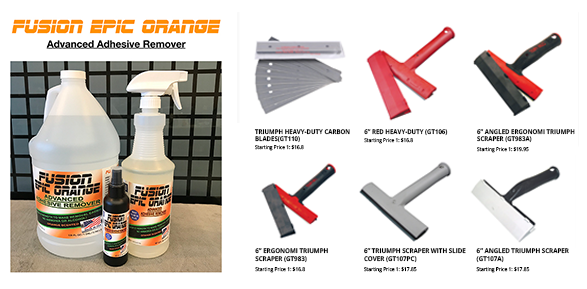
In case your windows have old tint on them, let’s quickly go through how to get it off. The difficulty of removing old tint depends on how old it is, what type of film or adhesive used, and the shape or contour of the glass. In general, you can remove tint by soaking the glass in some sort of stripping fluid, like oven cleaner or other great products. Once you’re done, you can scrape it off with a good blade or scraper.
The process of stripping old tint is usually easier if you can remove the glass, which we will get to soon if you’re unsure how to do it.
In general, here’s what to do:
- Remove the glass.
- Spray the glass with whatever tint stripper you’re going to use.
- Use a fresh blade to start scraping. Using a steamer before scraping will also help a lot.
- Rinse off the debris to see the spots you missed and do it again.
For really stubborn old film and adhesive, try the “bag method.” This is when you soak the glass in your tint stripper, tape a black plastic garbage bag over it, and then place it in the sun or a really hot place for an hour. Then, take the bag off and scrape it again.

Once your glass is ready for tint, find yourself some quality tinting film.
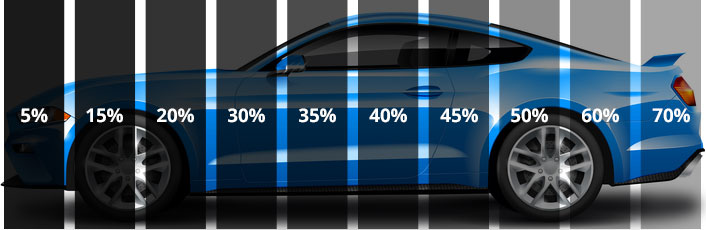
Choosing your tint
There are 4 main types of film:
- Dyed film is usually the least expensive, and is primarily for appearance rather than functionality. You can still get a good tint with dyed films, but the heat reduction isn’t particularly high, and the dye in the film will fade over time.
- Metalized film is infused with small metallic particles and gives the glass a very shiny, reflective surface. Its metallic nature will strengthen glass and make it more shatter-resistant. One problem with metalized film is that some brands tend to block cell phone, radio, and GPS signals.
- Carbon Film has a more matte finish if you want something that isn’t going to be shiny or reflective on the outside of the car. Carbon has no metal particles in it, and will not fade like dyed film.
- Ceramic film is the most expensive film because of its durability, effectiveness, and longevity. It is the most effective at blocking the UV rays, which can cause skin cancer and trigger certain medical conditions. Its tiny ceramic particles strengthen the glass without compromising radio or cell signals, plus its color will not fade.
Consider your budget
As with all important projects in life, your choice will largely come down to your budget. If you’re a beginner and you feel there’s a good chance you will mess up on your first couple tries, then you might want to consider getting an inexpensive film. Or, if you’re dead set on getting that chic ceramic finish, don’t be afraid to spend the extra amount on a good roll of ceramic film. Some shops will let you buy leftover film or half rolls so you don’t have to buy an entire 100-foot roll just to do one car.
Additional considerations
Try to visualize what your car will look like after the tint job and how it will all come together when you’re finished. If you have a matte paint job, maybe you want to match it with matte, carbon tint. On the other hand, you might want to contrast it with a flashier charcoal-colored metalized tint job.
There’s no right or wrong answer - just keep in mind how much a tint job can affect the overall aesthetics of your car. Your choice of film will depend on your budget and what you’re really trying to achieve with your tint job.
When buying your film roll, consider that a 100-foot roll can tint between 8 and 12 cars depending on the type of car.

You can go crazy with a lot of expensive tools, but if you just need to get started on your own at home, here’s a simple list of things to get before your tint job.
- Spray bottle
- Water
- Baby Shampoo
- Utility Knife, with blades
- Squeegees
- Scraper, with blades
- Paper Towels
- Heat gun (needed to shrink film)
- Tinters card

If your glass has old tint on it, follow the steps above to remove it. If not, the first thing you need to do is make sure your glass is spotlessly clean. Make a spray solution with five to ten drops of baby shampoo (or liquid soap) and make sure it’s mixed thoroughly.
You’re going to be using this spray solution to clean and lubricate the glass, but before you do that, consider if there are any electronics under the window that may be affected by getting soaked in water. Some newer cars have expensive modules or computers that can get destroyed by water.
To protect the electrical internals of your car, use a soak rope and cover everything - either with towels or specially made door covers
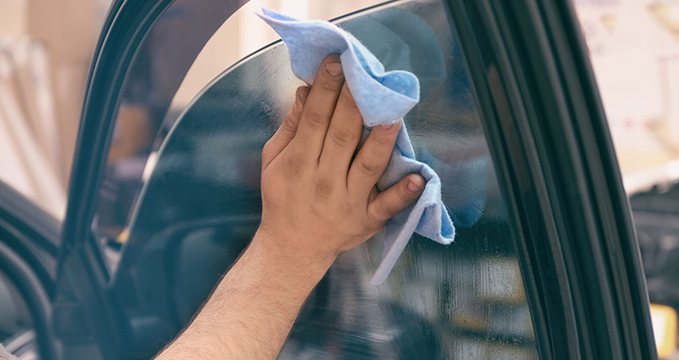
Get the window as clean as it can possibly be, using your spray and squeegee, and pay special attention to the corners and edges where dirt easily builds up over time. To clean inside the gaskets, consider getting a gasket wizard.

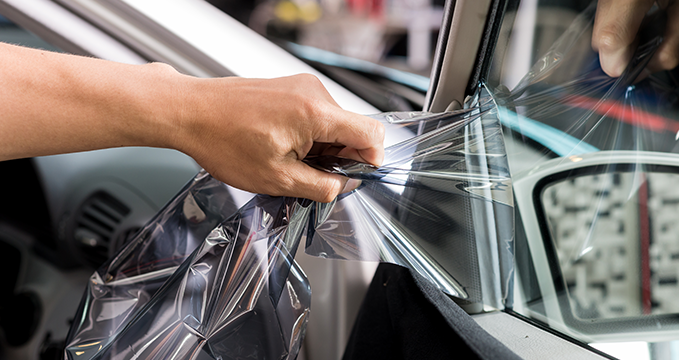
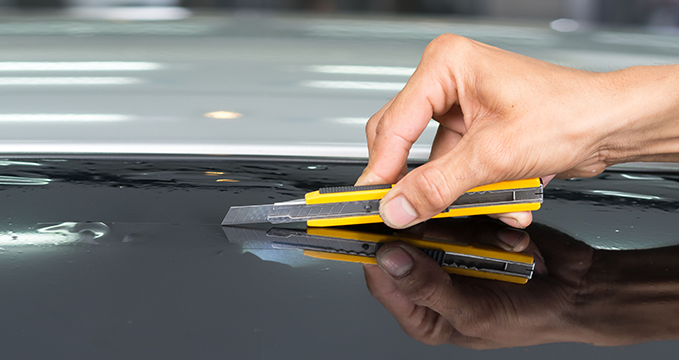
Measure how much film you need and cut your piece about an inch wider and longer than you need. You will be cutting this excess off later.
Lay the film on the outside of the window and get it to stick with your spray solution. Once it’s stuck on and positioned with an even amount of excess around the perimeter, carefully cut off the excess so it fits perfectly on the glass. Take your time cutting and be careful not to scratch anything.
Make sure the film is making flat contact on the whole surface of the glass. This is where a heat gun can help to shrink away bubbles or “fingers.”
Now you need to remove the liner from the film. Take two pieces of masking tape and stick them on each side of the corner of the film, so that when you pull them in opposite directions, the film separates from the liner.
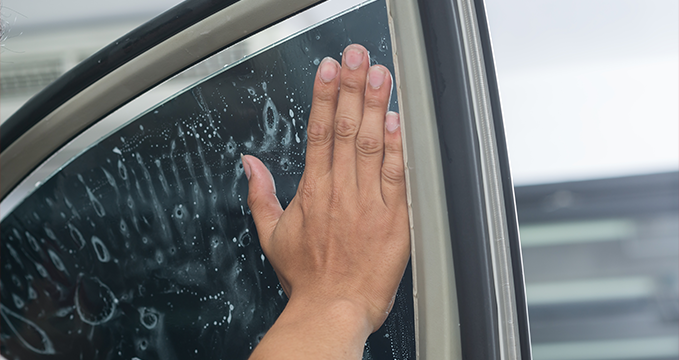
Next, spray the adhesive side (the sticky side) with your slip solution and be ready to apply the film to the glass.

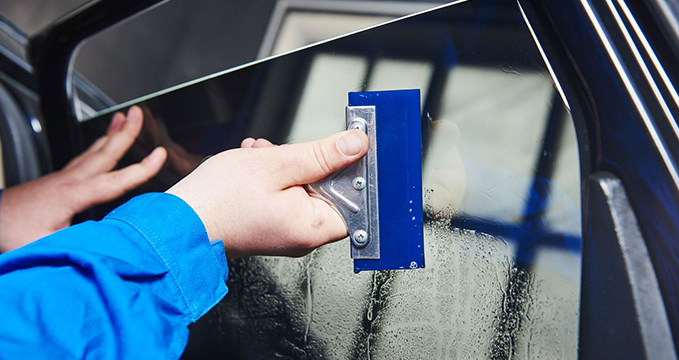
This is the important part, so take your time. First double check that the inside of the glass is still clean, and get it wet again with your spray solution. Taking the two top corners, lift up the film and drape it on top of the glass, using your fingertips to stick it on. Now use your squeegee or tinter’s card to get out all the bubbles and creases. Spray your slip solution over the tint once more, and squeegee out the excess water.
A standard squeegee technique is to start at the top in the center, come down and then off to the side in both directions, and then squeegee horizontally all the way to the bottom. Since the film was shaped and sized to the outside of the window, there might be little imperfections or deformities. These can be squeezed out with your card, heat gun, or fingertips.
There are a few important things to keep in mind when applying the film to the glass. First of all, try to remember to tuck the film into the weatherstripping. Also known as the “seals,” the weatherstrippling components help prevent leaks and create a tight fit when you close the car door. Tucking the film into the weatherstripping is essential if you want to create a clean, neat, and leak-free final final product for your clients. You can do this with a number of relatively simple tools, although you’ll need something thin enough to actually get in under the seals and press the film down. For this job, you’ll probably want to use something like a shank tool.
It’s also worth mentioning that automotive glass is almost never flat. Because of the curvature of these windows, you’ll need to make sure that the film adheres to the shape of the glass and mold neatly into place. This is achieved by shrinking. When you heat film, it naturally starts to mold to the shape of the glass. While this technique isn’t always easy, it’s one of the essential steps you need to take to create a professional-looking tint job.
Keep in mind that you cannot use the heat shrinking technique on all windows. Certain car models and brands feature glass that will not work with this method. In addition, heat shrinking should be avoided if you’re working with laminate glass. With all that said, this is the general process of heat shrinking:
- Lay your film on a thin layer of soapy water on the outside of the glass you want to tint
- Create a number of “fingers” (raised sections/bubbles) along the top and bottom with a horizontally anchored squeegee
- Quickly pass your heat gun over one finger until you see the film react
- Smooth the finger down, and repeat the process with all of the other fingers
- Cut the entire section to shape and apply to the inside of the glass, remembering to use a squeegee to smooth everything out carefully

The job is essentially done, but you still need to clean up and let the film dry out. Clean up your tools and dry out any wet spots in the vehicle. If you’ve got water stains on your door panels, these can usually come out with Armor All or something similar. If you’re experiencing any electronic issues because of the water, they will usually resolve themselves after the moisture has dissipated.
The dry-out process should take 3-5 days, but if you’re in a cold state or you’re having a wet winter, it could take 2-3 weeks for a good, dry seal to form. The best thing to do is just let your car sit in a warm, dry place undisturbed for a week, and resist the urge to touch the glass.
You’re done!
This is the entire process of tinting your car window. Remember to take your time and get it right the first time. Professional tinters spend years of their lives mastering this skill so don’t get frustrated if you struggle at first. Hopefully, you’ve enjoyed this guide. Don’t forget to stock up on high-quality tools for all your tinting needs.